

—
Introduction – Why the Pelvic Floor Deserves a Standing Ovation
Imagine a hammock that holds up every organ in your lower torso, supports your posture, and even helps you stay dry when you laugh. That unsung hero is your pelvic floor, a group of deep‑lying muscles that work silently behind the scenes of everyday life.
For most people, the pelvic floor only makes its presence known when it fails—when a sudden cough triggers a leak, when a long day on the bike leaves you with a dull ache, or when a new mom struggles to regain control after childbirth. The good news? You can re‑educate, strengthen, and revitalize this muscular “sling” with a set of simple, evidence‑based movements known as pelvic floor exercises (often called Kegels).
In this 2,000‑word deep dive, we’ll explore exactly what the pelvic floor does, why it matters at every stage of life, and—most importantly—how to master a practical routine that fits into your daily schedule. Whether you’re a busy professional, a postpartum parent, an athlete, or simply someone who wants to boost core stability, this guide gives you the actionable tools to feel stronger, move freer, and prevent common problems like urinary incontinence, pelvic organ prolapse, and low back pain.
—
1. Understanding the Pelvic Floor: Anatomy, Functions, and Common Issues
1.1 What Exactly Is the Pelvic Floor?
The pelvic floor is a diamond‑shaped hammock of muscles, ligaments, and fascia that stretches from the pubic bone at the front to the tailbone (coccyx) at the back, and from one sitting bone (ischium) to the other. The main muscle groups include:
| Muscle | Primary Role |
|——–|————–|
| Pubococcygeus (PC) muscle | Supports the bladder, uterus (in women), and rectum; controls urine flow |
| Iliococcygeus | Works with the PC to maintain continence and pelvic organ position |
| Deep transverse perineal muscle | Stabilizes the perineal body, important for sexual function |
| External urethral and anal sphincters | Provide fine‑tuned closure of the urethra and anus |
Together, these muscles contract and relax in a coordinated rhythm that underlies everything from a quiet sneeze to a powerful exhale during a lift.
1.2 Core Functions (Beyond “Holding It In”)
1. Urinary and Bowel Control – By tightening the urethral and anal sphincters, the pelvic floor prevents unwanted leakage.
2. Support for Pelvic Organs – It keeps the bladder, uterus (or prostate), and rectum in proper alignment, reducing the risk of pelvic organ prolapse.
3. Spinal and Hip Stability – The floor works hand‑in‑hand with the transverse abdominis, multifidus, and gluteal muscles to create a solid core, which is essential for low back health and athletic performance.
4. Sexual Function – Strong, flexible pelvic muscles enhance blood flow and increase sensation, contributing to improved arousal and orgasmic intensity.
5. Respiratory Coordination – During deep breathing, the floor gently descends to allow the diaphragm to expand, then lifts to assist with forced exhalation (e.g., coughing, laughing).
1.3 Who’s at Risk for a Weak Pelvic Floor?
| Population | Typical Triggers |
|————|——————|
| Pregnant & postpartum women | Hormonal relaxation, increased abdominal pressure, childbirth trauma |
| Men after prostate surgery | Nerve damage, altered pelvic anatomy |
| Aging adults (both sexes) | Natural loss of muscle mass, connective tissue weakening |
| Athletes (especially runners, cyclists, weight‑lifters) | Repetitive high‑impact forces, improper core engagement |
| People with chronic constipation or heavy lifting habits | Persistent straining increases floor tension and fatigue |
Understanding the why behind your personal pelvic floor challenges helps you select the right exercises, set realistic goals, and stay motivated throughout the journey.
—
2. Mastering the Basics: The Classic Kegel Exercise (And Its Variations)
2.1 The Original Kegel: Step‑by‑Step
Developed by Dr. Arnold Kegel in the 1940s, the classic Kegel is a focused contraction of the PC muscle without engaging the abdomen, thighs, or buttocks. Follow these steps to ensure you’re targeting the right fibers:
| Step | Action | Tips |
|——|——–|——|
| 1. Locate the Muscles | Pretend you’re trying to stop the flow of urine mid‑stream or avoid passing gas. The sensation of a “lift” at the base of the pelvis indicates the correct muscle group. | Do this only a few times to avoid confusing the bladder’s own sphincter—once you can feel it, move to the next step. |
| 2. Assume a Comfortable Position | Sit upright on a chair, stand with feet hip‑width apart, or lie on your back with knees bent. Choose the posture that lets you keep the abdomen relaxed. | Use a small pillow under your lower back if lying down to maintain a neutral spine. |
| 3. Contract & Hold | Tighten the identified muscles, pulling upward and inward. Hold for 3–5 seconds while breathing normally. | Avoid “bearing down” (the opposite of a contraction) or sucking in the belly; the breath should stay steady. |
| 4. Release Slowly | Gently relax the muscles for 5–7 seconds. This lengthens the fibers, improving flexibility. | Counting helps maintain the timing. |
| 5. Repeat | Perform 10 repetitions (a “set”) and aim for 3 sets per day. | Gradually increase hold time to 8–10 seconds as you get stronger. |
2.2 Common Mistakes (And How to Fix Them)
| Mistake | Why It’s Problematic | Correction |
|———|———————|————|
| Holding breath | Increases intra‑abdominal pressure, defeating the purpose of a gentle lift. | Keep a relaxed, natural breath; count silently while contracting. |
| Engaging glutes or thighs | Shifts the focus away from the deep floor muscles, creating an “overall squeeze” that doesn’t train the PC. | Lightly place a hand on your inner thigh; if it tenses, relax the thigh and refocus on the pelvic lift. |
| Over‑contracting (squeezing too hard) | Can lead to muscle fatigue, pain, and even trigger urgency. | Aim for a moderate, firm lift—like a gentle “yes” to a question, not a maximal effort. |
| Doing Kegels while urinating regularly | May cause urinary retention or incomplete emptying. | Use the “stop‑flow” sensation only for identification, then practice Kegels on a separate schedule. |
2.3 Progression Variations for a Well‑Rounded Routine
| Variation | Description | When to Add |
|———–|————-|————|
| Quick Flicks | Contract for 1‑2 seconds, then release. Perform 15–20 rapid repetitions. | Improves fast‑twitch fibers; great for athletes and to counteract reflex leakage during coughing. |
| Elevator Exercise | Visualize an elevator moving up floors: contract a little (floor 1), add a bit more (floor 2), up to floor 5, then reverse down. | Enhances gradated control and awareness of varying contraction intensities. |
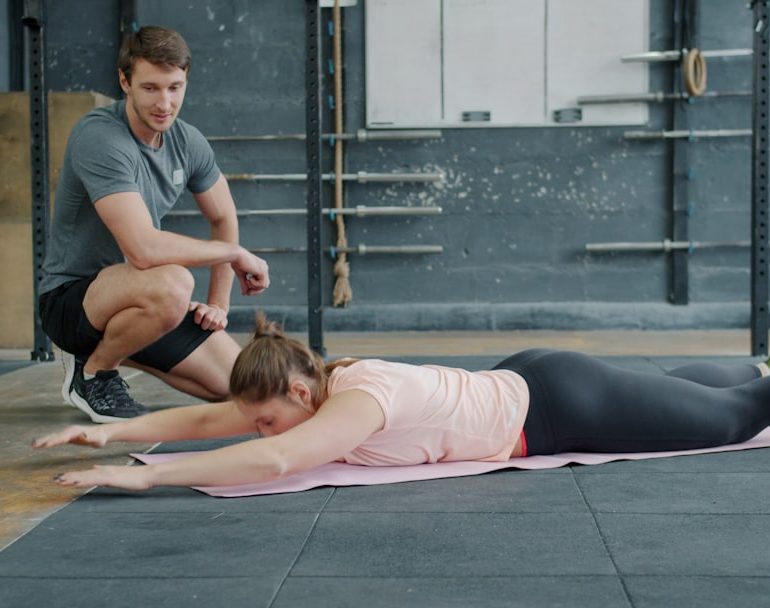
| Supine Hip‑Lift Kegels | Lie on your back, knees bent, lift hips a few inches while maintaining a pelvic floor contraction. | Engages the floor in a functional position, linking it to glute activation and lower back stability. |
| Standing Functional Kegels | Perform a contraction while performing a functional movement—e.g., lifting a light box, or during a squat. | Transfers strength to daily activities and sports. |
| Biofeedback‑Guided Kegels | Use a small vaginal or rectal sensor (available through physical therapists) that provides visual or auditory feedback. | Ideal for those who struggle with awareness or have persistent incontinence. |
—
3. Integrating Pelvic Floor Work into a Holistic Core Program
A strong pelvic floor is most effective when it works synergistically with the rest of the core. Below is a full‑body, low‑impact circuit that you can do 2–3 times per week, each session lasting about 20 minutes.
3.1 Warm‑Up: Breath & Mobilize (3–4 minutes)
| Exercise | Reps/Duration | Key Cue |
|———-|—————|———-|
| Diaphragmatic Breathing (lying on back, hands on belly) | 5 deep breaths | Allow belly to rise, then gently draw the pelvic floor down on the exhale. |
| Cat‑Cow (Marjaryasana‑Bitilasana) | 8 cycles | Move slowly, coordinating each spinal flexion/extension with a subtle pelvic floor lift (up on arch, down on round). |
| Hip Circles (standing, hands on hips) | 5 each direction | Keeps the sacroiliac joints supple, reducing compensatory tension in the floor. |
3.2 Core Circuit (12–15 minutes)
| Exercise | Sets | Reps | Pelvic Floor Cue |
|———-|——|——|——————-|
| Dead‑Bug (alternating arm‑leg extensions) | 3 | 10 each side | Keep the floor firm as the arm/leg extends; avoid arching the low back. |
| Side‑Plank (knees bent for beginners) | 2 | 30‑sec each side | Lightly engage the floor to prevent sagging; imagine the floor pulling your belly button toward your spine. |
| Glute Bridge with Kegel | 3 | 12 | Lift hips while contracting the floor; hold the contraction for the duration of the bridge. |
| Standing Bird‑Dog (alternating opposite arm/leg lift) | 2 | 8 each side | Focus on stable pelvis—the floor should stay gently engaged, not wobble. |
| Squat to Chair (or box) | 3 | 12 | As you rise, squeeze the floor; as you sit, release. This trains functional strength for daily activities. |
Rest 30‑45 seconds between sets.
3.3 Cool‑Down & Stretch (3–4 minutes)
| Stretch | Hold | Pelvic Cue |
|———|——|————|
| Child’s Pose (Balasana) | 45‑sec | Let the floor soften completely, encouraging a gentle stretch of the pelvic muscles. |
| Supine Hamstring Stretch (strap or towel) | 30‑sec each side | Keep a light floor contraction to protect the low back while stretching the posterior chain. |
| Hip Flexor Stretch (low lunge) | 30‑sec each side | Breathe into the stretch; avoid “pushing the belly forward” which can over‑activate the floor. |
Why this matters: By coupling pelvic floor activation with core stability, gluteal engagement, and proper breathing, you build a balanced muscular chain that reduces the likelihood of compensatory overload—one of the leading causes of chronic low back pain and urinary leakage.
—
4. Tailoring Pelvic Floor Training to Specific Life Stages
4.1 Pregnancy & Postpartum: The “Pregnancy‑Safe” Protocol
| Phase | Focus | Recommended Routine |
|——-|——-|———————-|
| First Trimester | Awareness & gentle activation | Perform 5‑second Kegels (3 sets of 10) while lying on your side; avoid Valsalva (holding breath). |
| Second Trimester | Strength + endurance | Add quick flicks (15 reps) and elevator exercises (up to floor 4). Incorporate supine hip‑lift Kegels 2–3 times/week. |
| Third Trimester | Relaxation & coordination | Emphasize slow releases (7‑second holds, 7‑second relax). Begin pelvic tilts while seated to prepare for labor. |
| Early Postpartum (0–6 weeks) | Gentle re‑education | Use digital feedback (a clean finger) or a small, soft vaginal cone to confirm a mild contraction. Perform 5‑second holds while supine, 2 sets of 8. |
| Mid‑Postpartum (6‑12 weeks) | Build endurance | Expand to 10‑second holds, add quick flicks, and start standing functional Kegels during daily chores. |
| Beyond 12 weeks | Return to pre‑pregnancy strength | Integrate full core circuit (section 3) and consider biofeedback or physiotherapy if leakage persists. |
Safety Note: If you experience pain, bleeding, or any signs of infection,

At King Edward Medical College, he was the recipient of the “Most Distinguished Student” award and graduated at the top of his class. Upon completing his medical education, Dr. Zafar went on to pursue his urology training at Royal Shrewsbury Hospital and at Ealing and Hammersmith Hospitals in England. In 1994, he completed a Fellowship in Endourology at Methodist Hospital in Indianapolis, Indiana. The focus of his fellowship was in urinary and bladder stones, male and female incontinence, and male impotence.
Dr. Zafar has been an active member of the American Urological Association, American Association of Clinical Urologists, and Society of Laparoscopic Surgeons.